Updating the Synapse 5.0K+ inverter to the latest firmware through PC
Summary:
This article's scope looks at the correct way to perform firmware updates on the Synapse 5.0K+ inverter using a PC/computer, battery and communication cable.
Overview:
Before updating the inverter, ensure that you have the following:
1. A PC/computer with the latest firmware for the inverter, which can be downloaded on:
http://ftps.voltronic.com.tw/R/Rubicon-553AF2CC1A6A43989371/Warning%2069%20for%20all%20models/AXPERT%20KING%205K/
Note: There are 2 firmware's needed for this firmware update -
The Main board software: AxpertKING5KW71.97 (71.97 is the version of the firmware)
The control card software (MCU): Remote Panel_Reflash_MCU (02.66) (2.66 firmware version)
The files come in .rar file extension/file type; do not extract them - perform the update by just opening the rar files.
2. Communication cables


USB to RS232 converter (PC side) Serial RS232 cable (inverter side)
3. A functioning 5.0K+ inverter
4. A functioning 48V DC battery and cables to connect to direct to the inverter
Updating the 5.0K+:
Note: Ensure that the inverter is not connected to any PV or AC input. Also disconnect any load that might be connected to the inverter.
Only the battery must be connected to the inverter for this update.
Begin by updating the main board:
Locate the AxpertKING5KW71.97 folder from your PC downloads; open the application file - AxpertKINGReflash.
Select the relevant serial comms port then click Update.
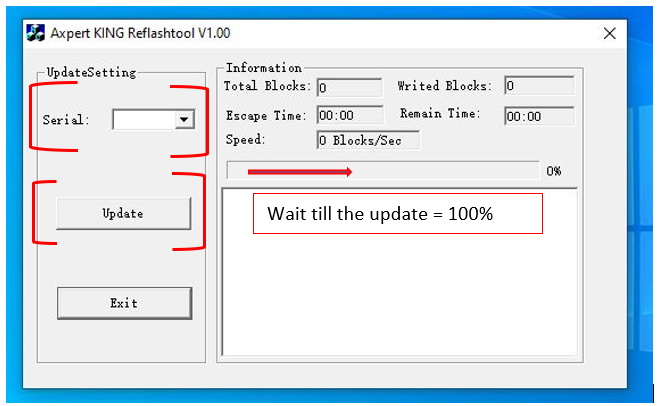
Note: When the inverter begins to update, the inverter display will show "UPG YES". Only click Exit once the update has reached 100% and the display is back to normal display.
Second update:
Locate the Remote Panel_Reflash_MCU(02.66) folder from your PC downloads; open the application file - Remote Panel_ReflashTool.exe.
Follow with the second update - MCU:
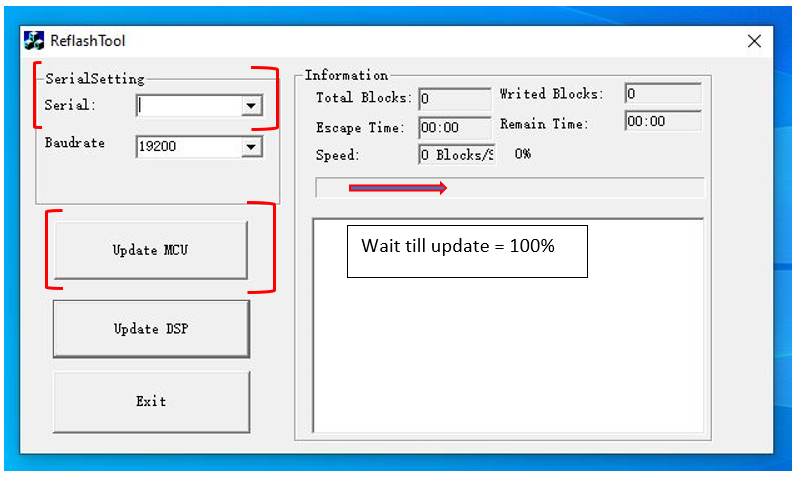
Note: When the inverter begins to update, the inverter display will black-out. Only click Exit once the update has reached 100% and the display is back to normal display.
Additional information:
- Common errors which could occur:
- “Error 32” – Loss of communication between the PC and inverter. Switch off the inverter & battery and check if all the communication cables are properly connected and restart the updating process. On counting down of the inverter timer upon restarting the unit - begin the updating process. Do not wait for the full count down. If the issue persists, contact technical support department.
- Updating never reaches 100% – Switch off the inverter and battery and restart the system. Begin the updating on the inverter count down.