This article describes the steps you can follow in order to retrieve event logs from your Synapse 5.0KRM+ Inverter
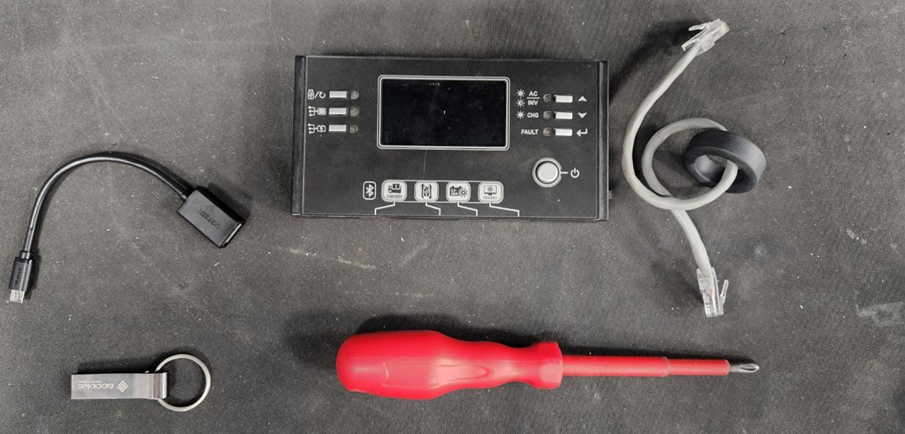
Tools required:
Phillips screwdriver
Type-C Male to USB Female OTG Connector Adapter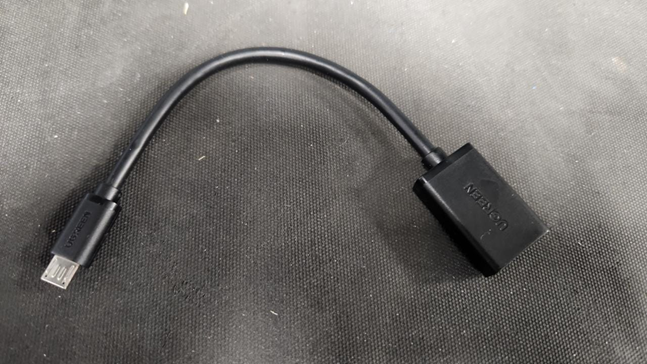
USB drive
5.0K+ display/control panel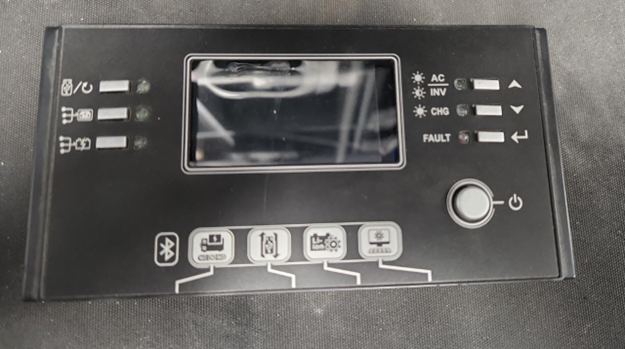
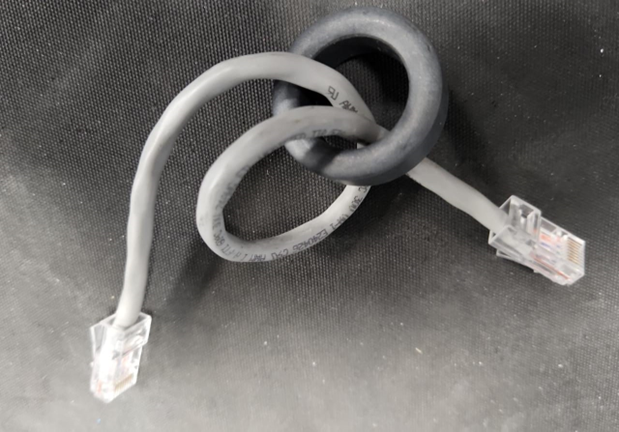
RJ45 Ethernet cable with ferrite ring (ferrite ring is important!)
Overview of all the necessary tools:
Steps to retrieve event logs from the 5.0KRM+
Step 1:
Remove 14 top cover screws from the 5.0KRM+

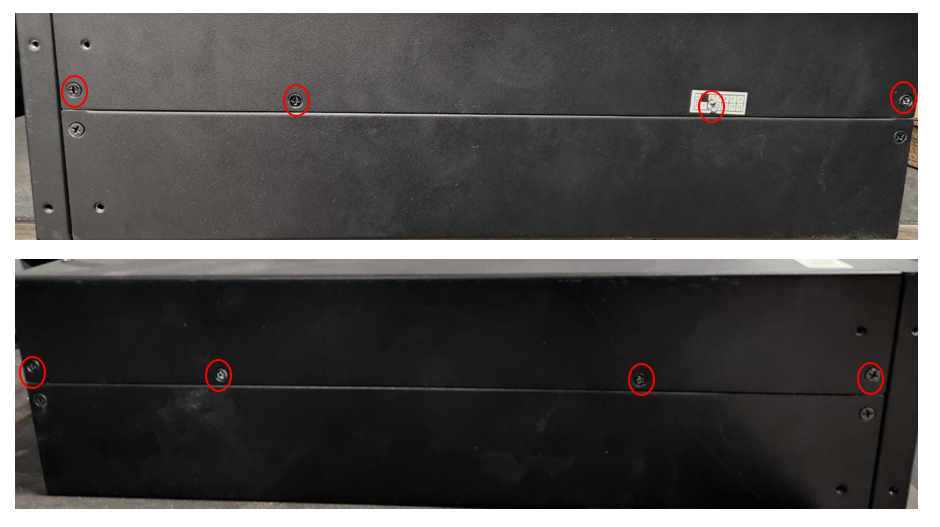
Step 2:
Remove the top cover from the unit and locate the communications/junction board towards the bottom of the unit.

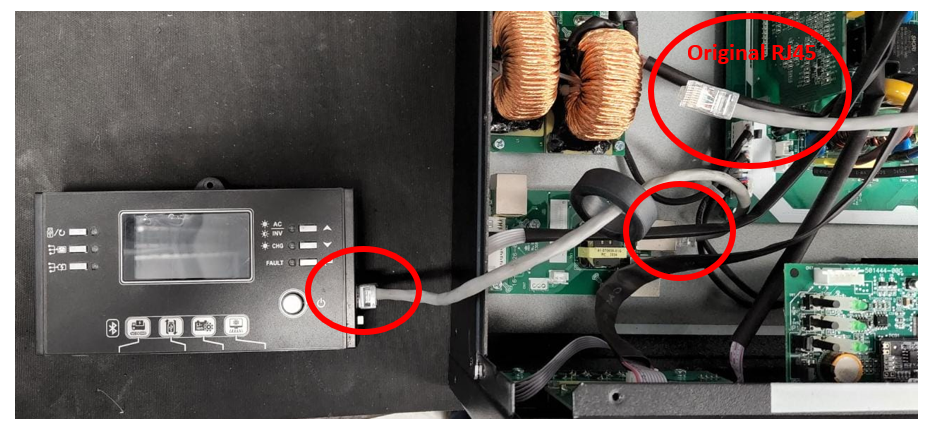
Step 3:
Disconnect the ethernet cable which is currently connected into the communications/junction board and plug in your ethernet cable into the 5.0K+ control panel and into the communications/junction board.
Step 4:
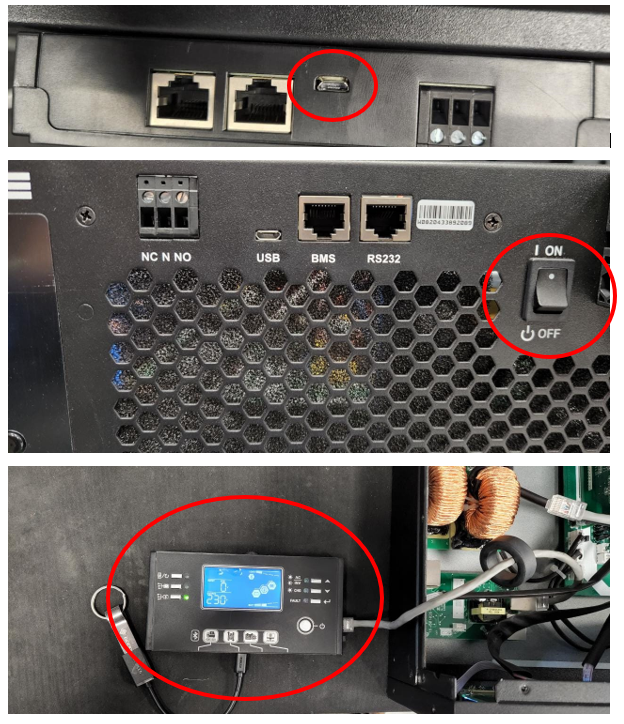
Connect your USB drive and OTG adapter into the USB port on the 5.0K+ display/control panel and turn the 5.0KRM+ on from the main on/off switch located on the front of the unit.
Step 5:
Once the 5.0KRM+ has turned on, you can now proceed to hold the refresh/USB button on the 5.0K+ control panel for 3 seconds to open the USB menu.
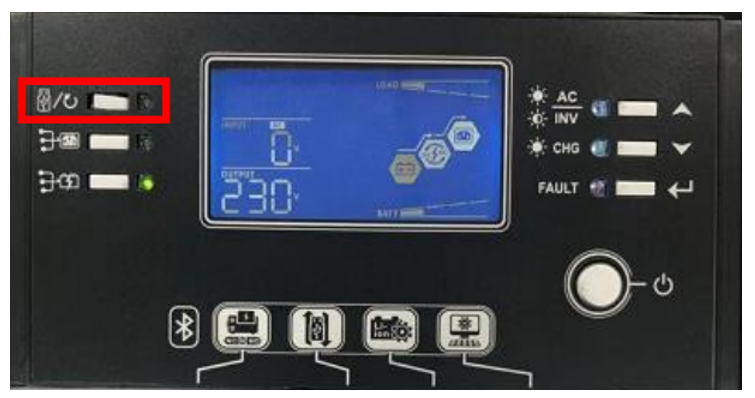
Step 6:
Press the bottom left button on the 5.0K+ control panel to open the export function.

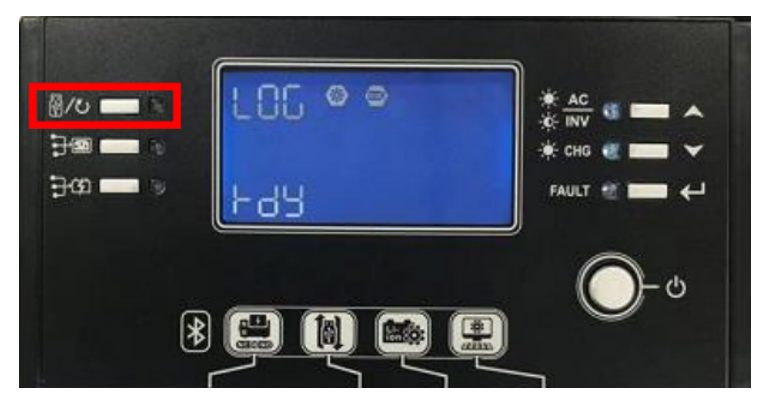
Step 7:
Wait about 3 seconds and then the LCD will display “dY” once you see this press the USB button on the 5.0K+ control panel to confirm the selection.
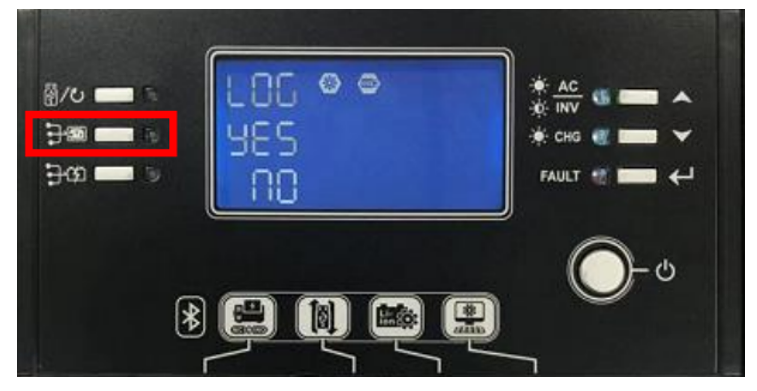
Step 8:
Press the middle left button on the 5.0K+ control panel to confirm the export.
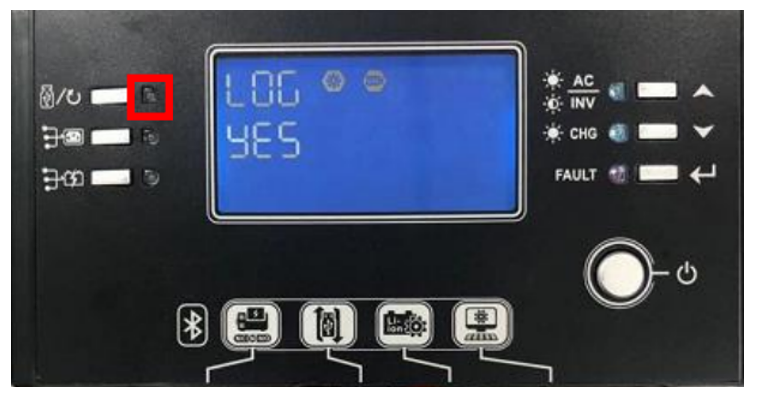
Step 9:
The unit will start to export the event logs, this process will take about a minute and the USB LED will flicker until it has exported the event logs, once the logs have been exported the USB LED will light solid green.
Step 10:
Remove the USB from the control panel and insert it into your laptop, the filename will be the last 8 digits of the 5.0KRM+ serial number and it will be saved as a text file.
