Connecting 2 or more Synapse 7.2M+ inverters in parallel with 2 possible configurations

1. Overview:
The Synapse 7.2M+ inverter comes pre-installed with the parallel card with the current sharing and communication cable also included.

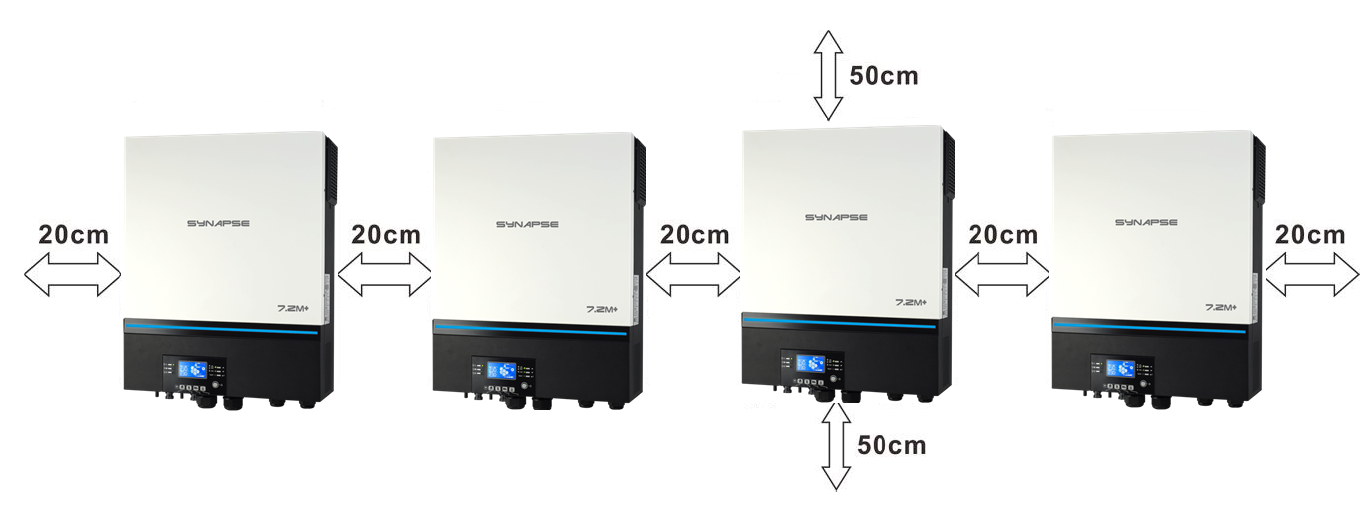
For proper ventilation and heat dissipation, follow the installation guide as depicted below:
2. Configuration:
The Synapse 7.2M+ can be configured in 2 ways:
1. Parallel operation in single phase with up to 6 units connected together. The total maximum power supported in this configuration is 43.2 kW/43.2 kVA (7.2M+ X 6).
2. Parallel operation in three phase where a maximum of four units can be installed per phase. The maximum power output that is supported is 43.2 kW/43.2 kVA.
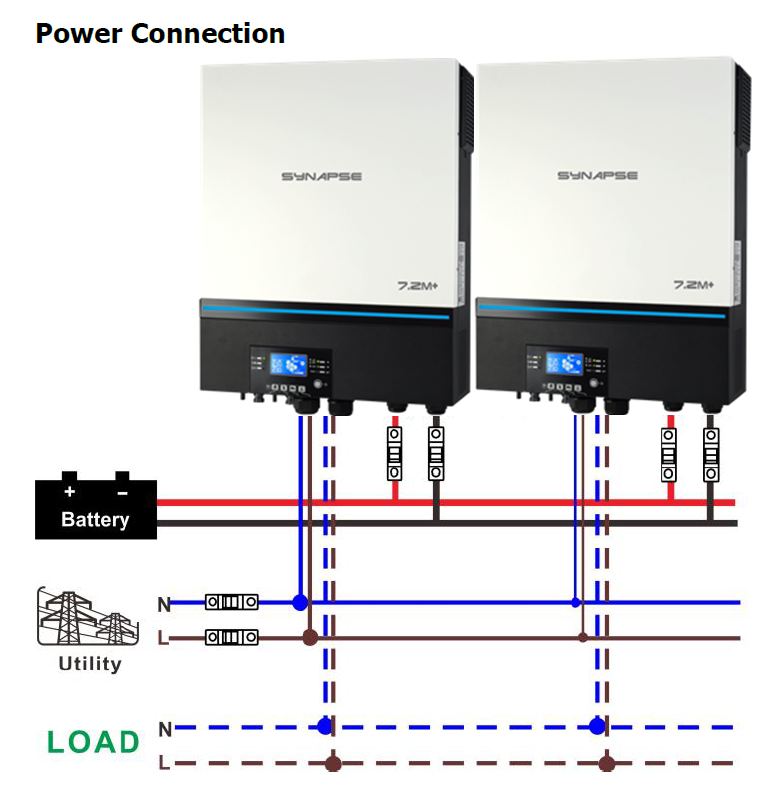
3. Single Phase Electrical Installation:
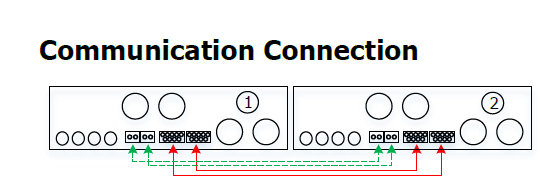
2 inverters in parallel on a single phase:
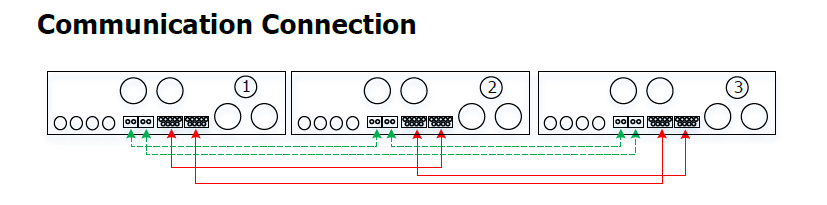
3 inverters in parallel on a single phase:

Four inverters in parallel on a single phase:
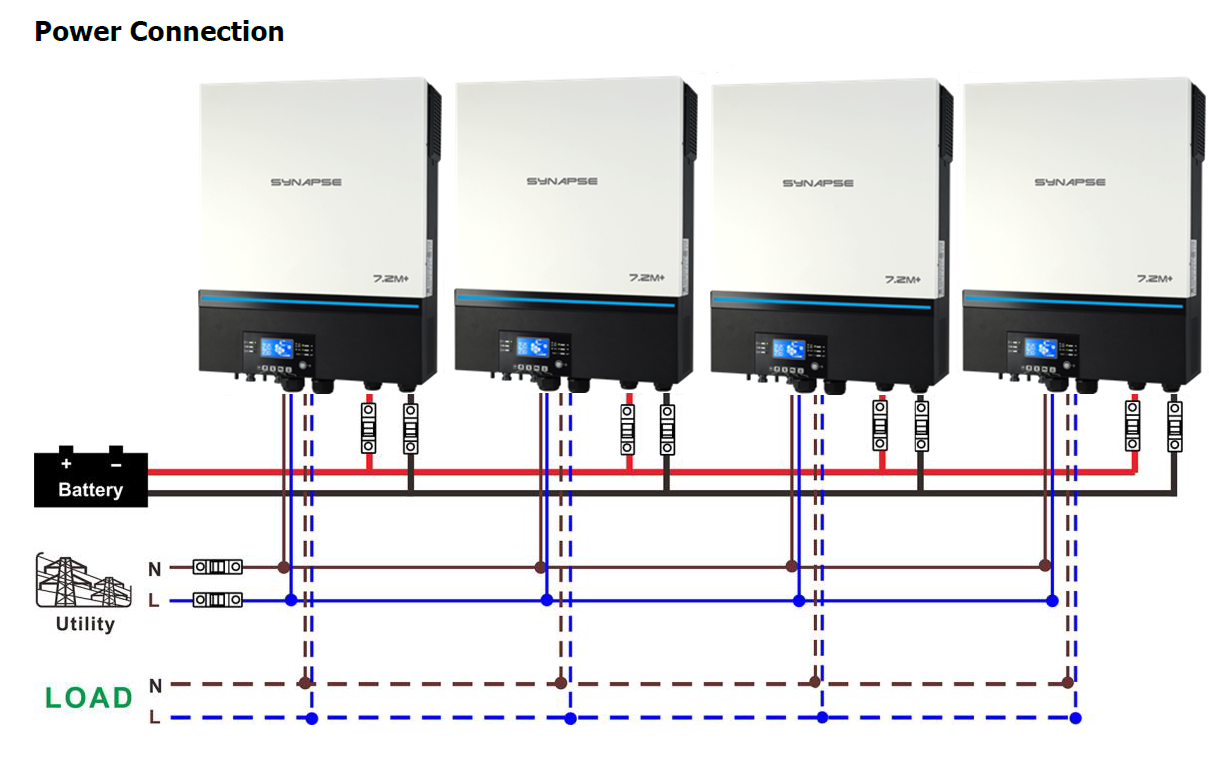
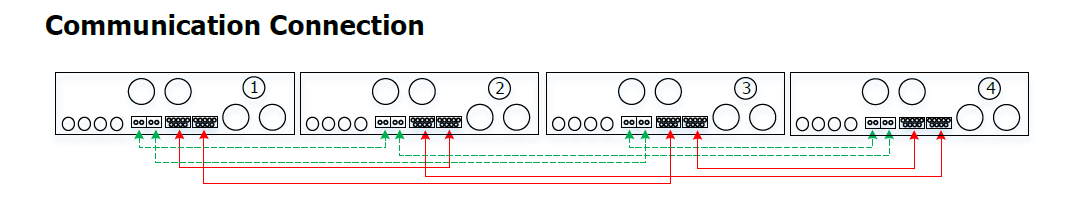
Note: You can configure as illustrated above up to a maximum of 6 inverters on a single phase.
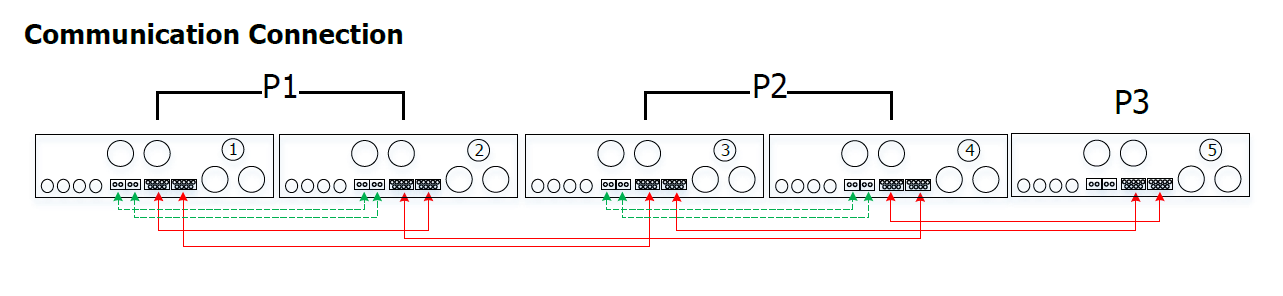
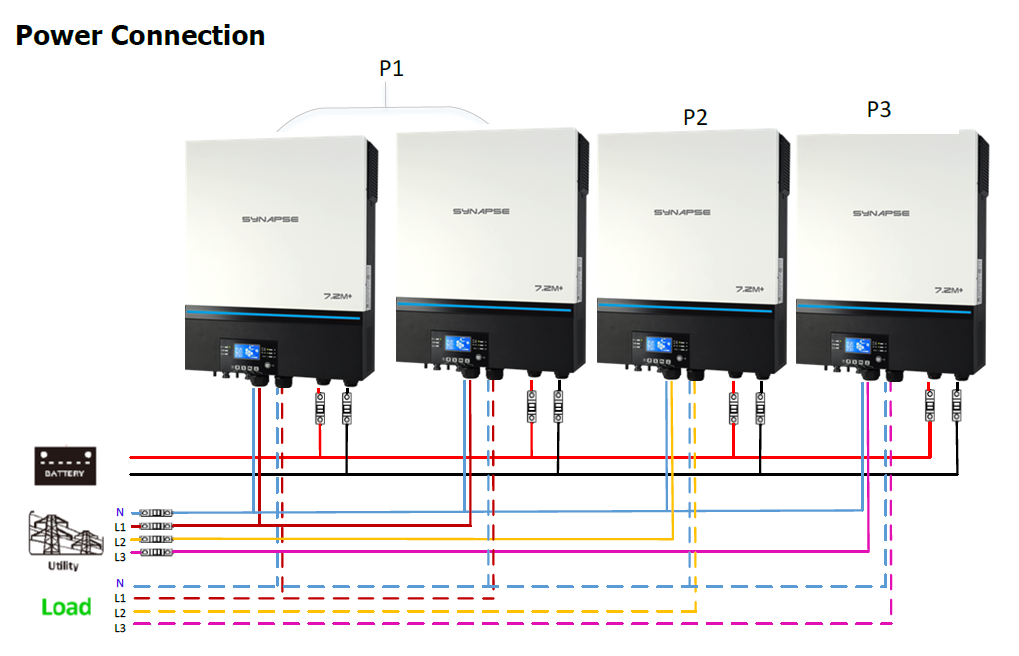
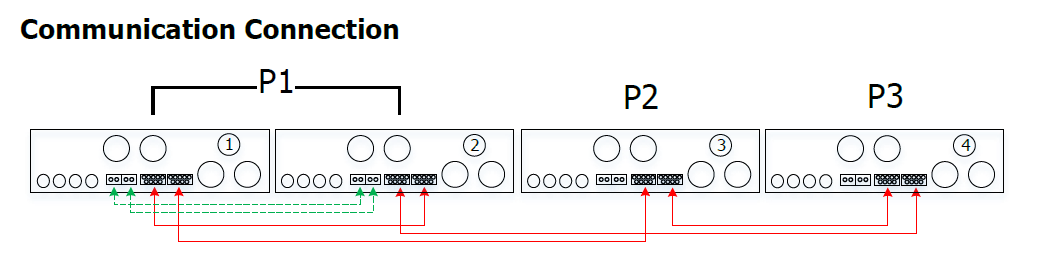
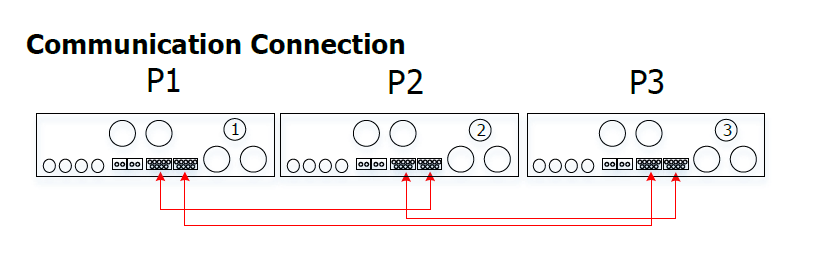
4. Three Phase Electrical Installation:
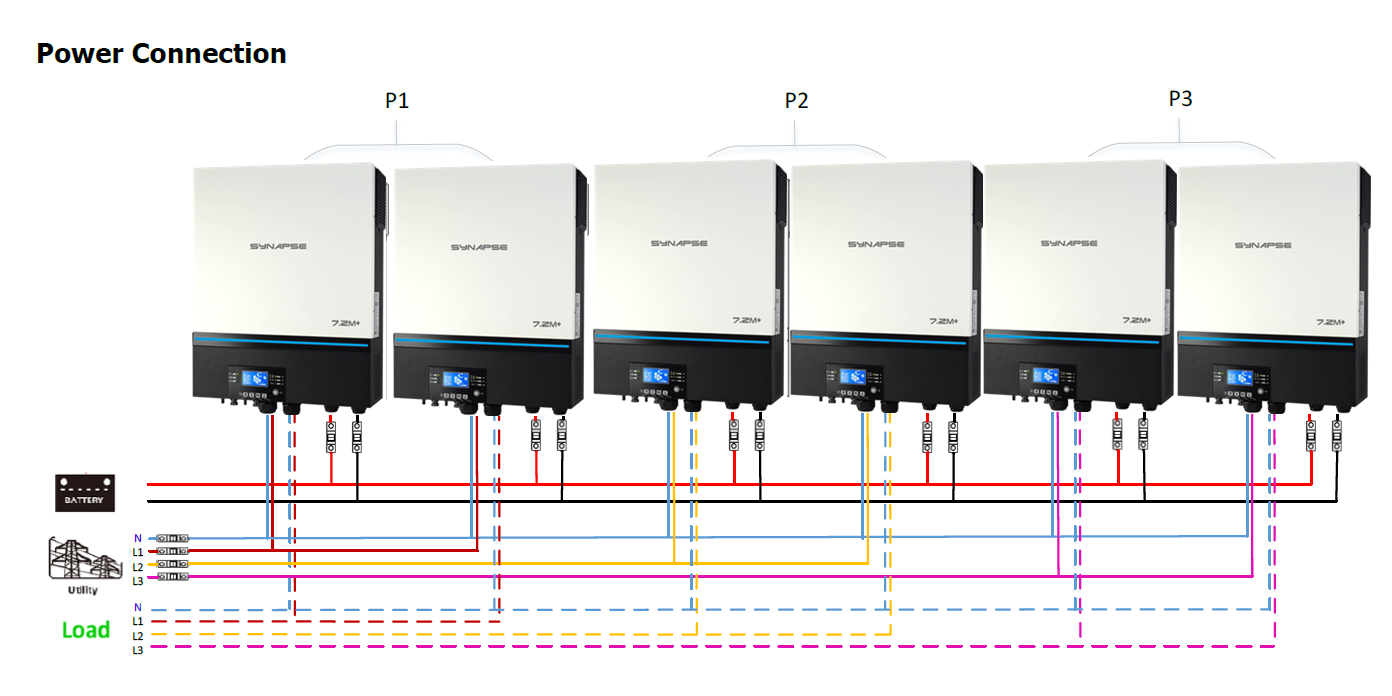
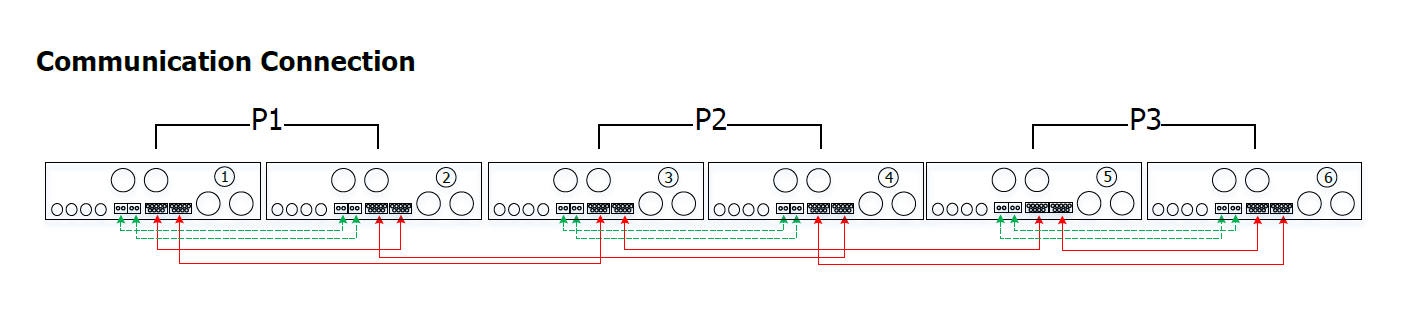
Two inverters on each phase on a three phase:
Four inverters on one phase and two inverters on the remaining two phases:
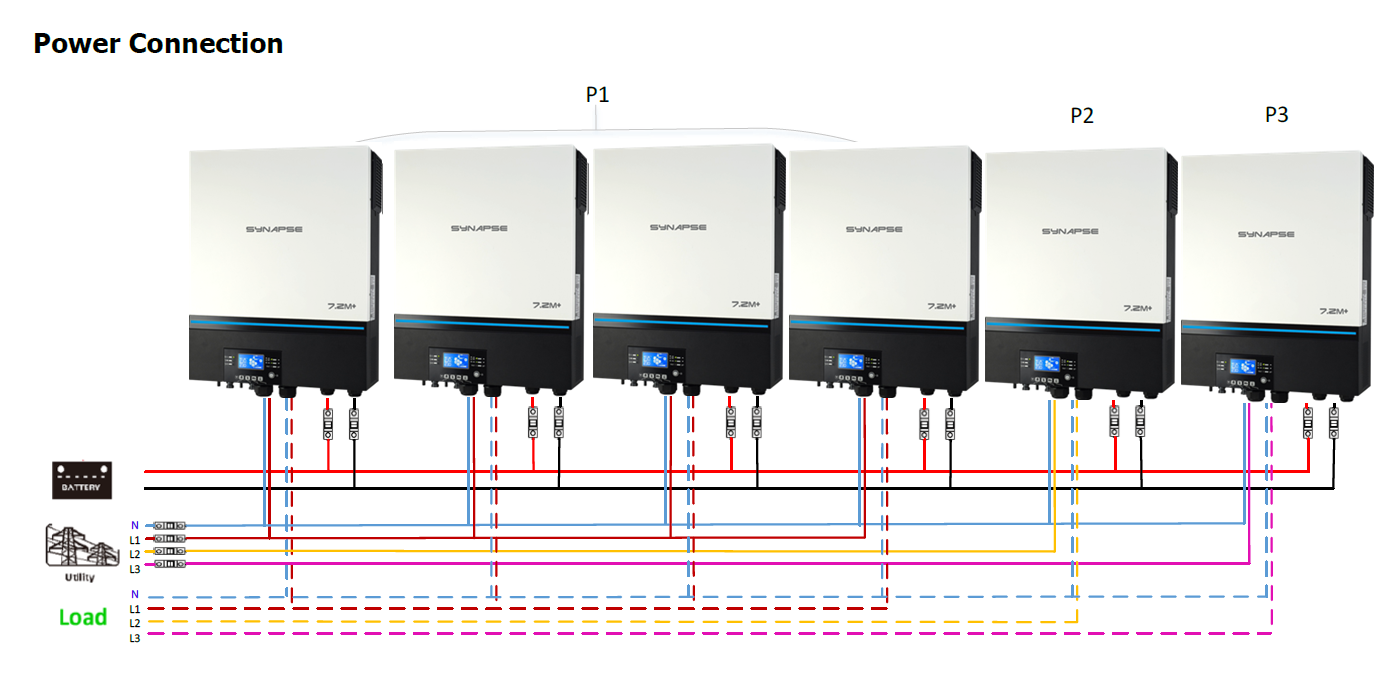
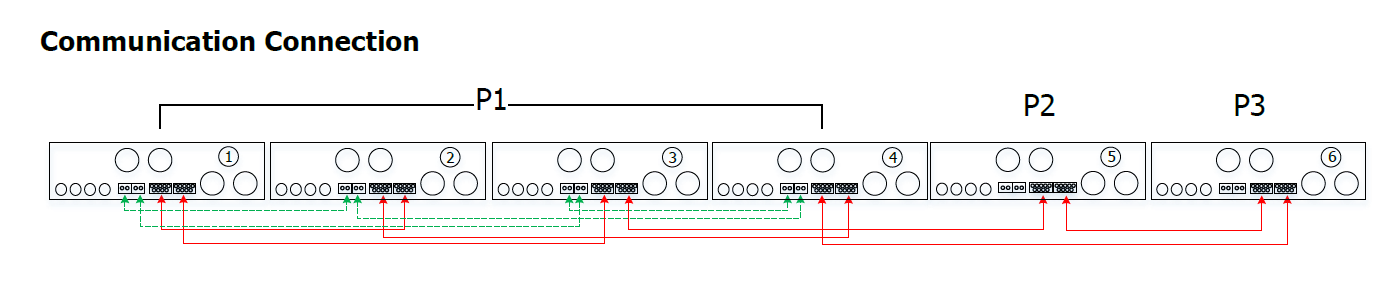
Three inverters in L1, two inverters in L2 and one inverter in L3:


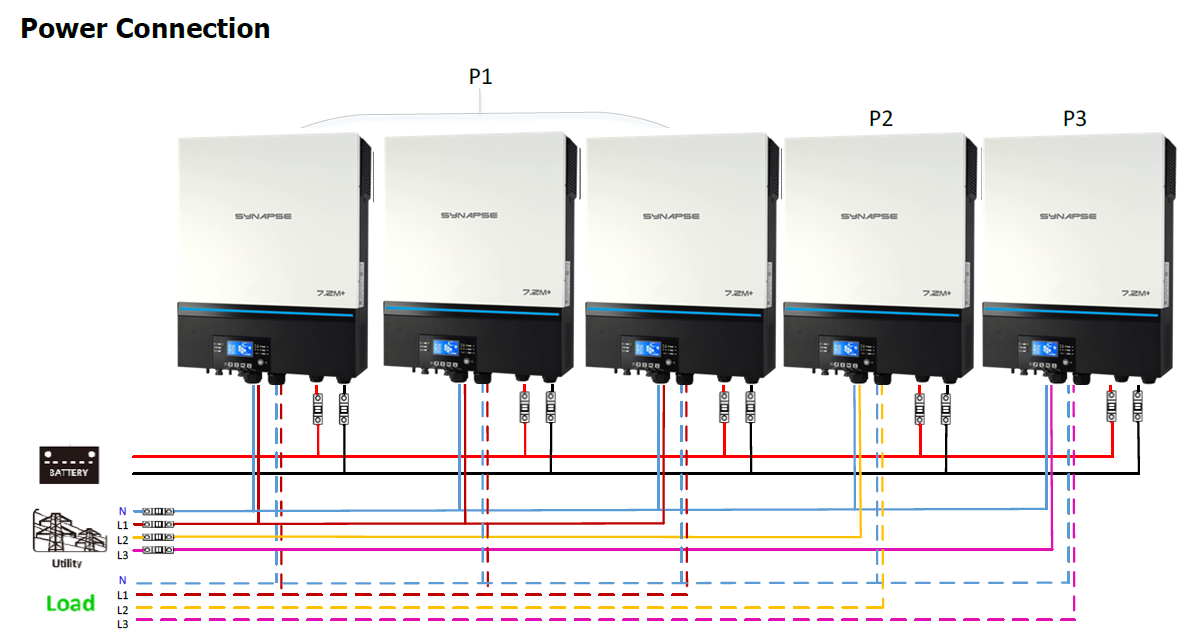
Three inverters in L1, one inverter in L2 and one inverter in L3:

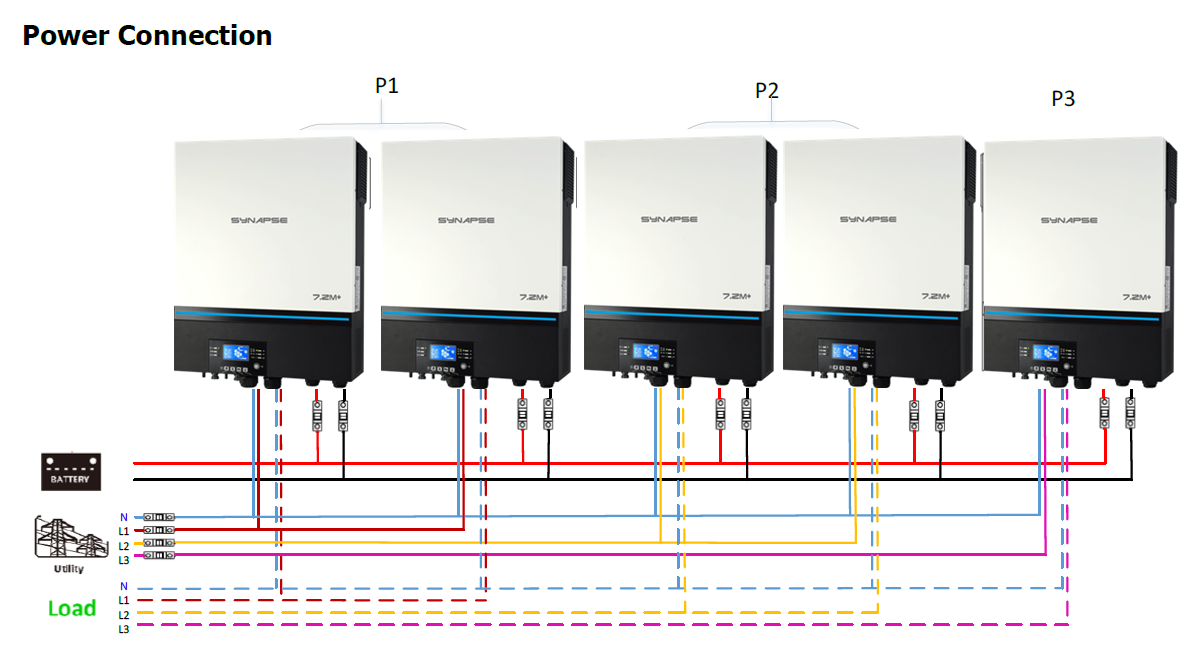
Two inverters in L1 and L2 and one inverter in L3:
Two inverters in L1, one inverter in L2 and one inverter in L3:
One inverter per phase:

Note: No current sharing cable is required for phases where only 1 inverter is installed. Do not connect current sharing cables across different phases as this can cause damage to the inverters.
5. LCD setting and display:
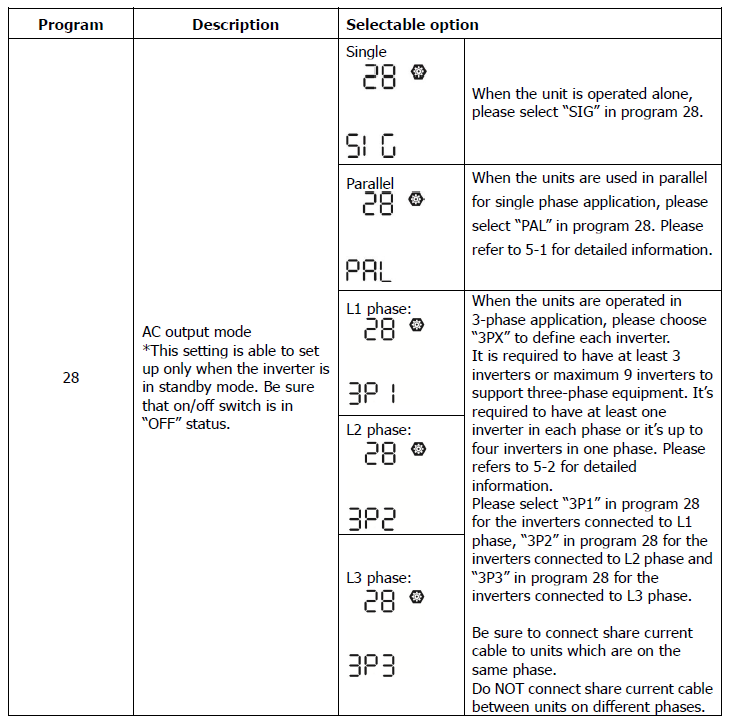
Program/Parameter 28: For units used in parallel on a single phase - this parameter needs to be set to "PAL".
In a 3 phase configuration - Program/parameter 28, select "3P1" for all inverter(s) connected on L1, "3P2" for inverter(s) connected to L2 and lastly "3P3" for all inverter(s) connected on L3.
Program/Parameter 30:
When program "ONE" is selected and any of the inverters in single or three phase have PV array connected (PV input is normal), the system will prioritize PV first to feed load. If PV is not sufficient to supply load , battery power will supply second and utility third. Please note that if PV and Battery power are not sufficient the system will use utility only, to feed the load required.
When program "ALL" is selected and all of the inverters in single or three phase have PV array connected (PV input is normal), the system will prioritize PV first to feed load. If PV is not sufficient to supply load, battery power will supply second and utility third. Please note that if PV and Battery power are not sufficient the system will use utility only, to feed the load required.
6. Commissioning:
Note: Once a setting is made on the inverter - restart the system so that the setting may be registered in the unit.
6.1 Parallel in single phase:
Step 1: Check the following requirements before commissioning:
- Correct electrical connection
- Ensure that all load-side Live circuit breakers are open and that the Neutral wires of each unit are connected together.
Step 2: Turn on each unit and configure Setting 28 to “PAL” on the LCD display of each unit. Then shut down all units.
Step 3: Turn on each unit.

NOTE: Master and slave units are randomly defined.
Step 4: Switch on all input AC breakers. Ideally, connect the inverters to the utility supply at the same time. If an AC supply is detected, the inverters will start up and work normally.

Step 5: If there are no fault alarms, the parallel system installation is completed.
Step 6: Switch on all load breakers. This system will start to provide power to the load.
6.2 Parallel in three phase installations:
Step 1: Check the following requirements before commissioning:
- Correct electrical connections
- Ensure that all load-side circuit breakers are open and that the Neutral wires of each unit are connected together.
Step 2: Turn on all units and configure parameter 28 as 3P1, 3P2 and 3P3 sequentially. And then shut down all units.
NOTE: It’s necessary to turn off the switch when setting the LCD program. Otherwise the settings can not be programmed.
Step 3: Turn on all units sequentially.

Step 4: Switch on all AC input breakers. If AC connection is detected and all three phases are matched with each unit's settings, they will work normally. Otherwise, the AC icon will flash and they will not work in line mode.

Step 5: If there are no fault alarms, the system to support 3-phase equipment is completely installed.
Step 6: Please switch on all load breakers. The system will begin to provide power to the load.