This article looks at the correct way to configure Goodwe Wi-Fi connections
Summary:
Ensure that you have a working laptop / PC or smartphone and that the Goodwe inverter is powered on.
Begin the configuration:
Step 1:
Using a laptop/PC or smartphone, open the network settings on your device and search for a Wi-Fi connection designated Solar-WIFIXXXXXXXX. The XXXXXXXX characters represent the last 8 characters of the inverter's serial number.
Note:
If the Wi-Fi connection is not visible, reset the Wi-Fi module.
On the EM models, the reset button located on the front cover.
On the ES models, the reset button is located under the meter cable port.
Step 2:
Once you have connected to the mentioned wi-fi, enter Password: 12345678.
Step 3:
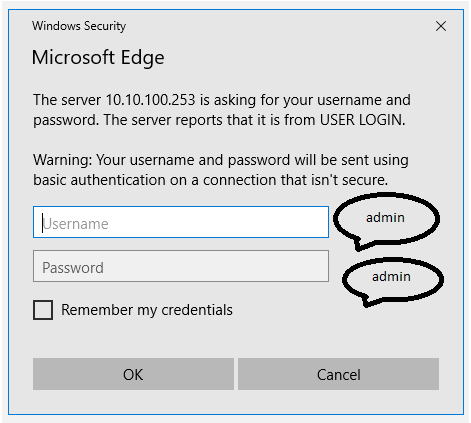
Open a web browse on your device and enter the following IP address: 10.10.100.253
A window will come up showing:
Username: admin
Password: admin > OK
Step 4:
Click on Start Setup:

Note: Possible causes of your laptop / PC or smartphone not connecting may be:
Weak reception of signal
Incorrect password or username
No router is connected
Step 5:
After clicking Start Setup, the following window will open. Select your wireless network from the list. The RSSI field indicates signal strength.

Once you have selected the strongest available wireless network, fill in the password and click Next and then Complete.
If your wireless network is not detected, there is an option to add it manually by clicking Next.
Once that is done, Save Success will be displayed.

Step 8:
Click on Save.
Note:
Ensure that the password, encryption method / algorithm is correct and is the same with the router.
Once all is performed correctly, the Wi-Fi LED on the inverter will change from a double flash/blink to a quartic flash then to a solid state - that meaning that the Wi-Fi is successfully connected to the SEMS portal.